Using GPU Instance
Create an Instance
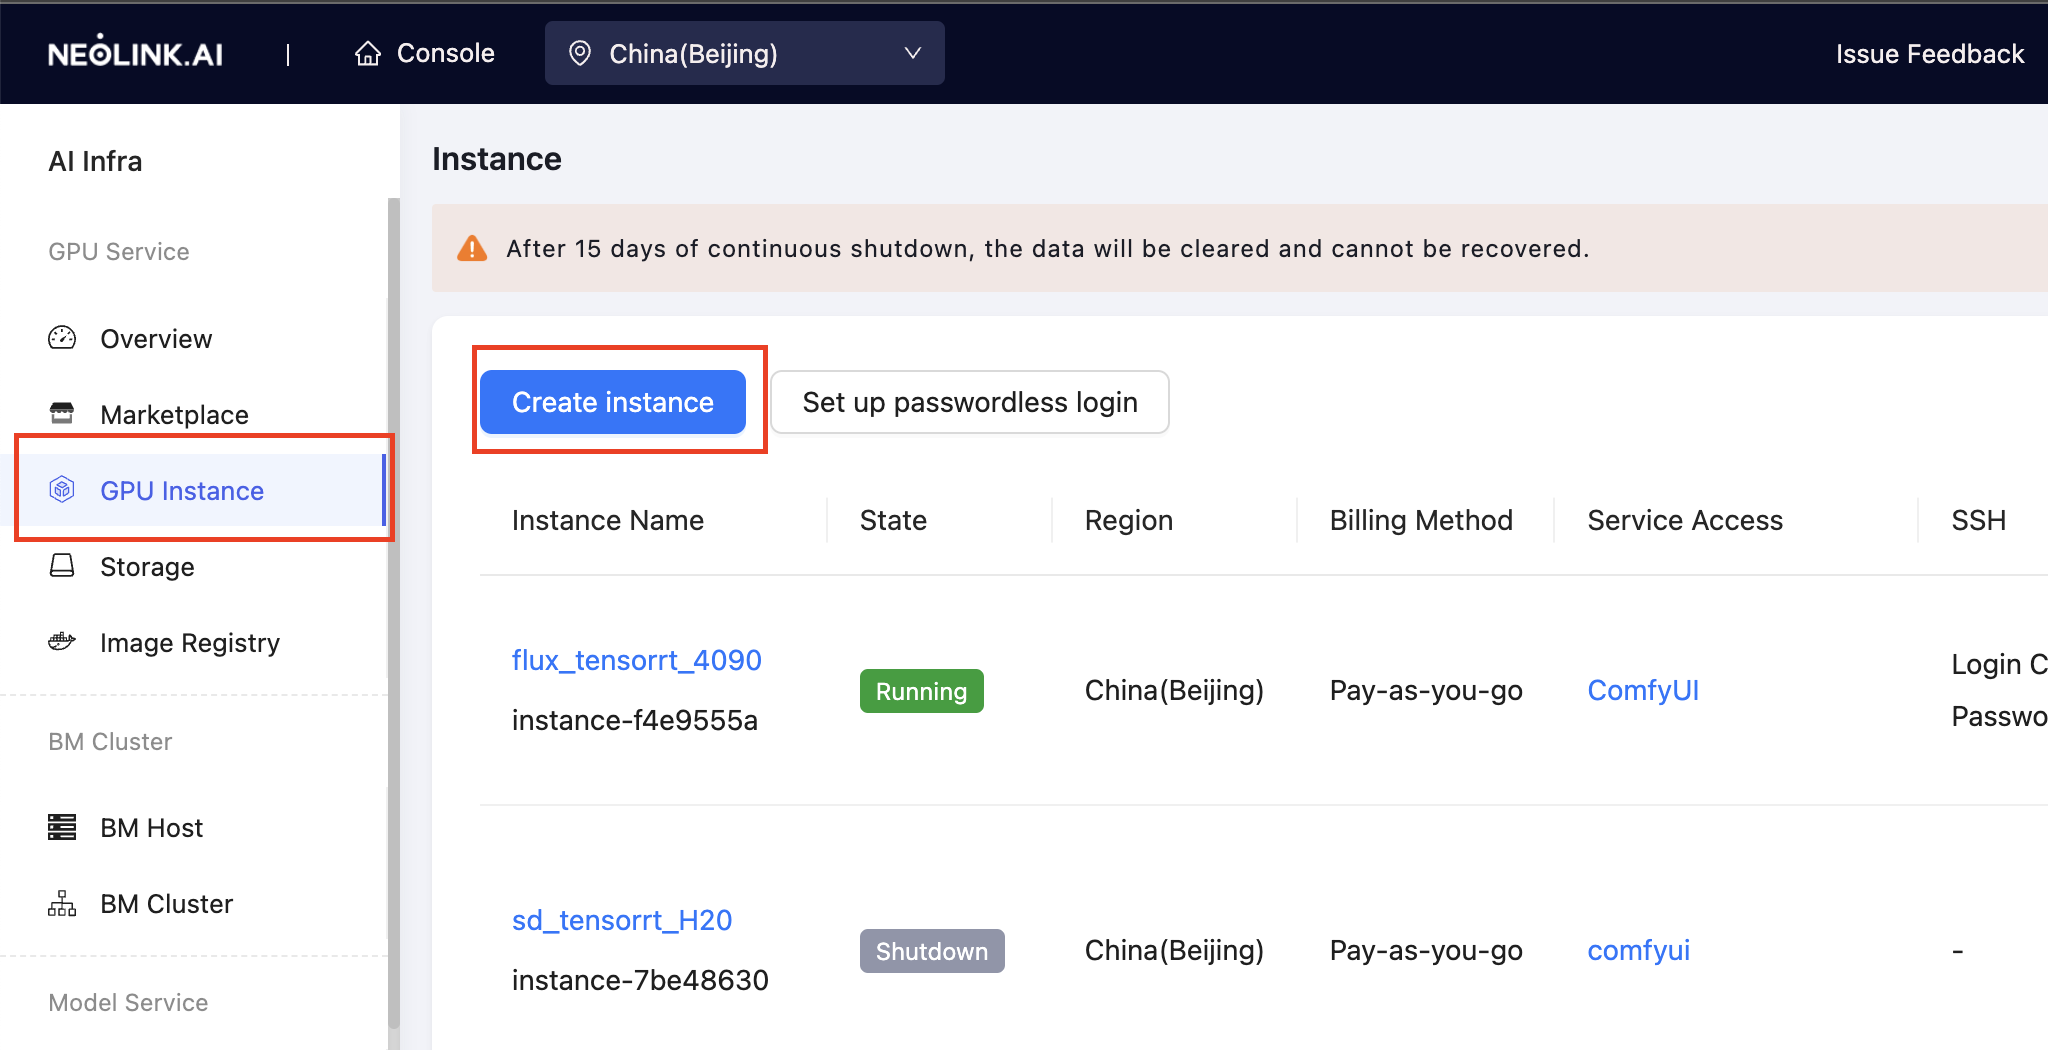
Go to the Overview page, navigate to GPU Instance in the sidebar, and click Create Instance.
Renting an Instance
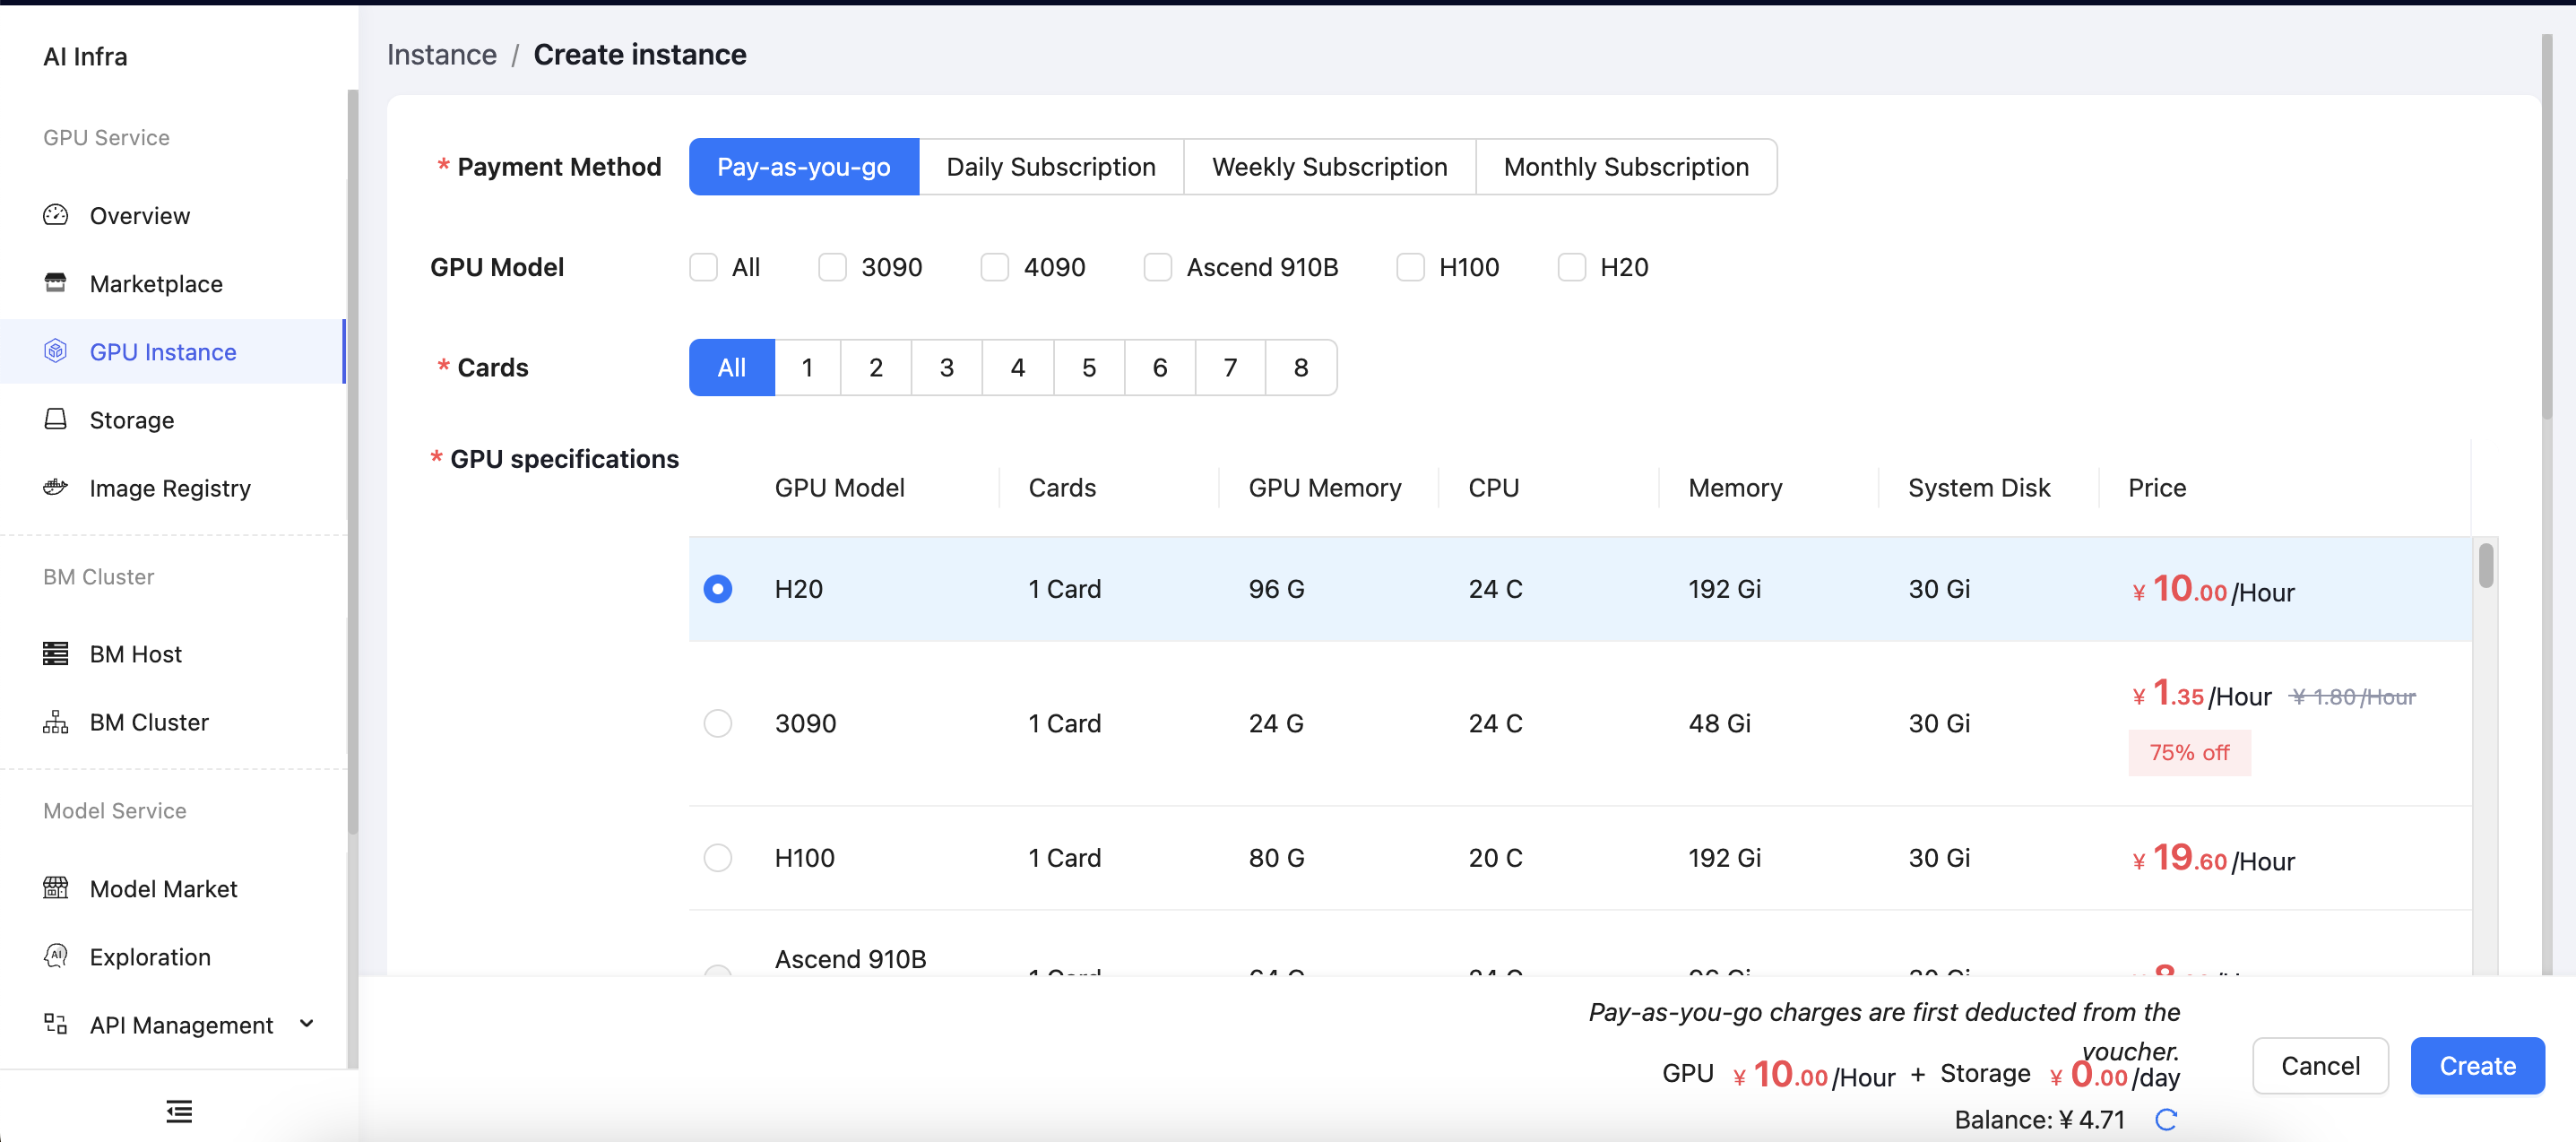
On the Create Instance page, select the Region, Payment Method (pay-as-you-go, daily, weekly, or monthly), GPU Model, Cards, and GPU Specification. Choose the Image (pre-installed with different deep learning frameworks), and then click Create. If you need more disk space to store data, set the desired expansion size.
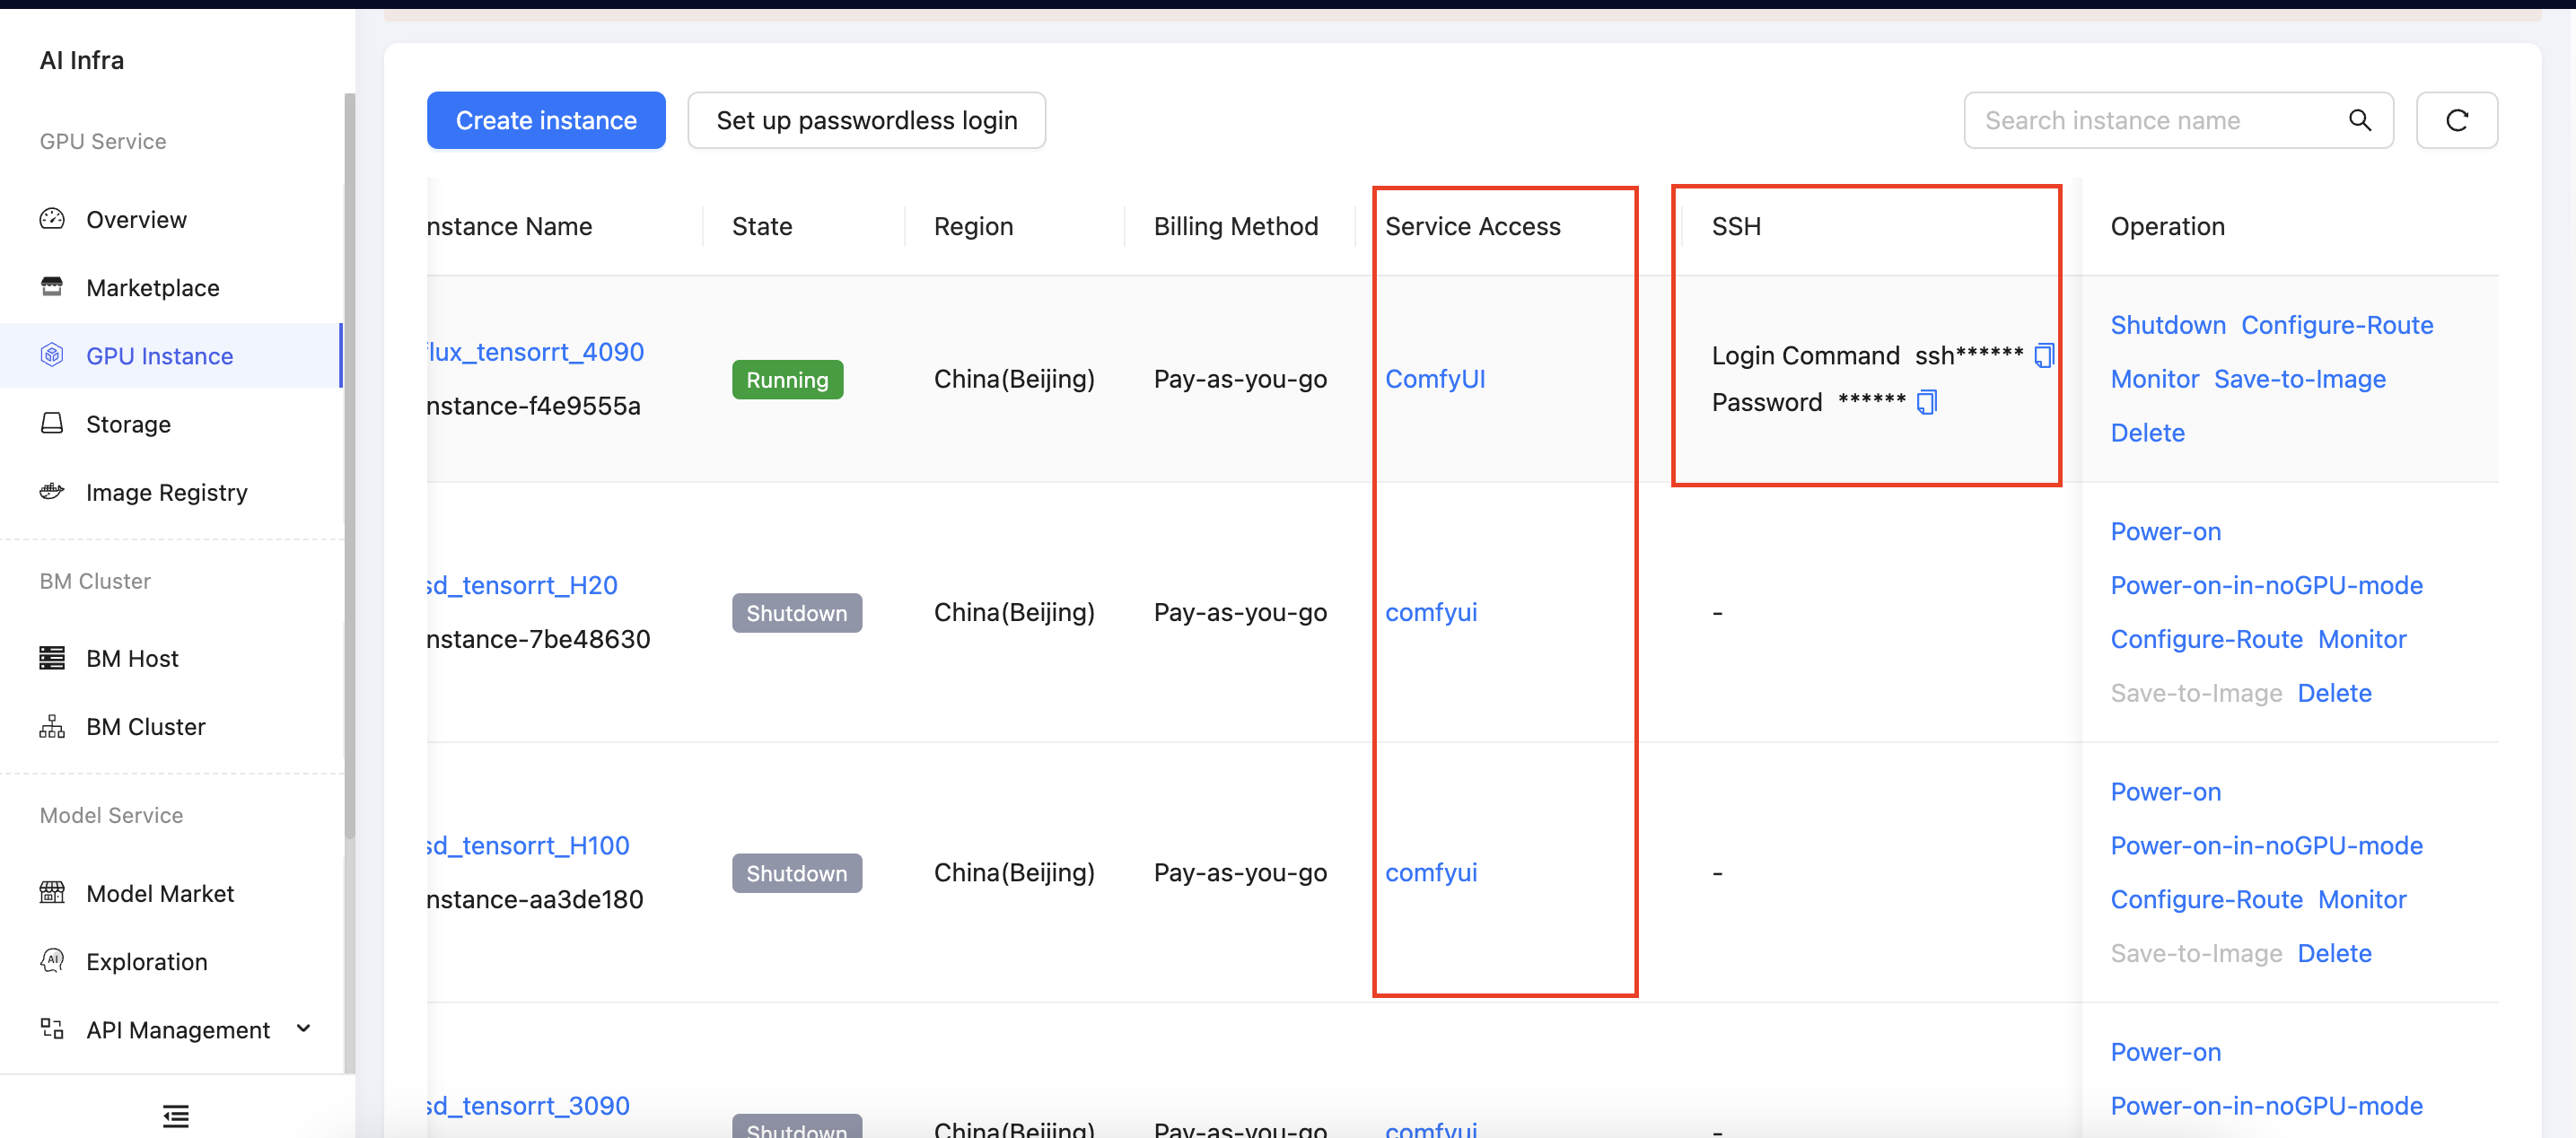
After the instance is created, wait for it to start. The primary operation entry points are shown below.
Uploading Data
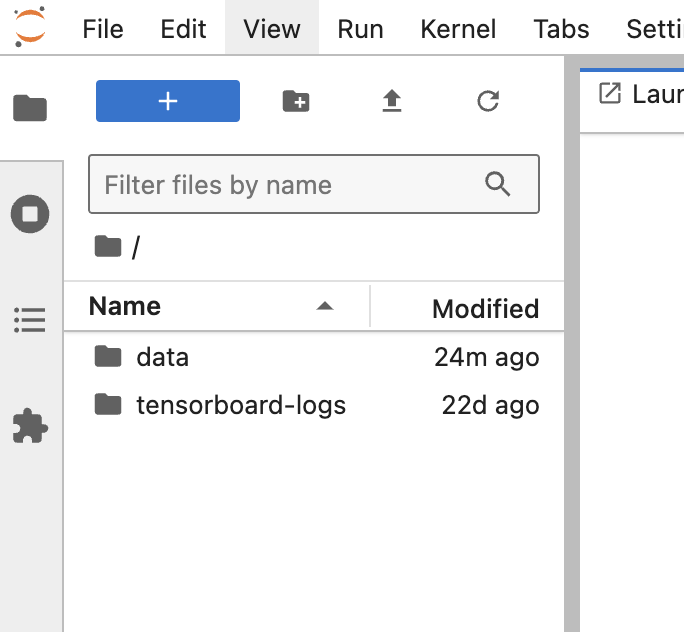
Go to the Overview page. After the instance is running, find the JupyterLab shortcut tool on the instance and open it. In the screenshot below, locate the Upload button to upload your data.
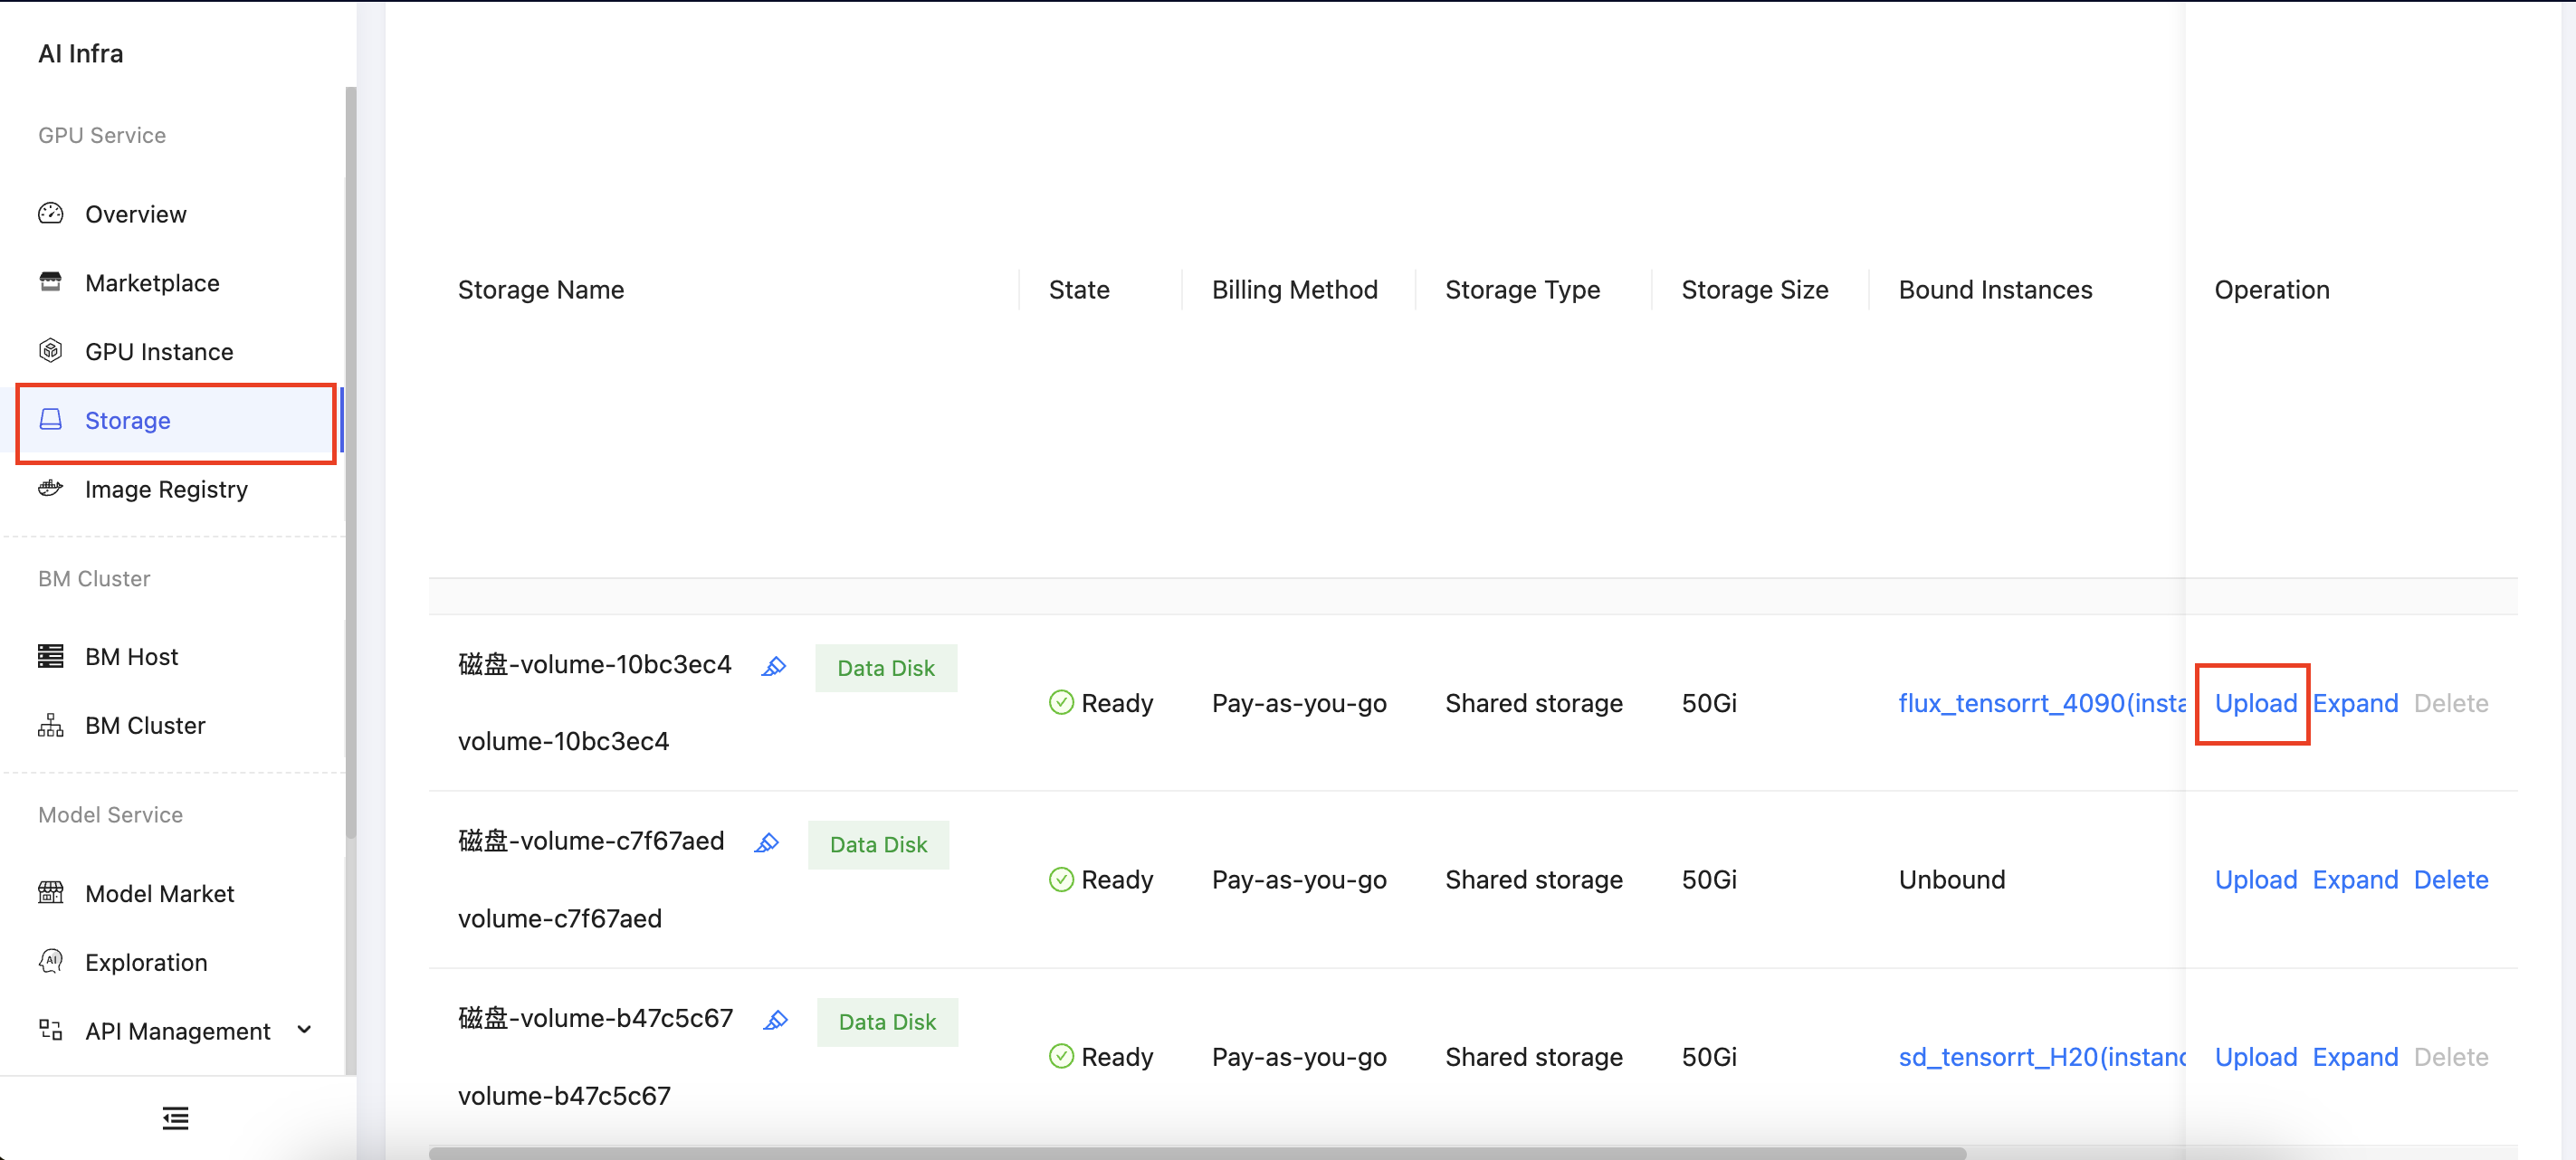
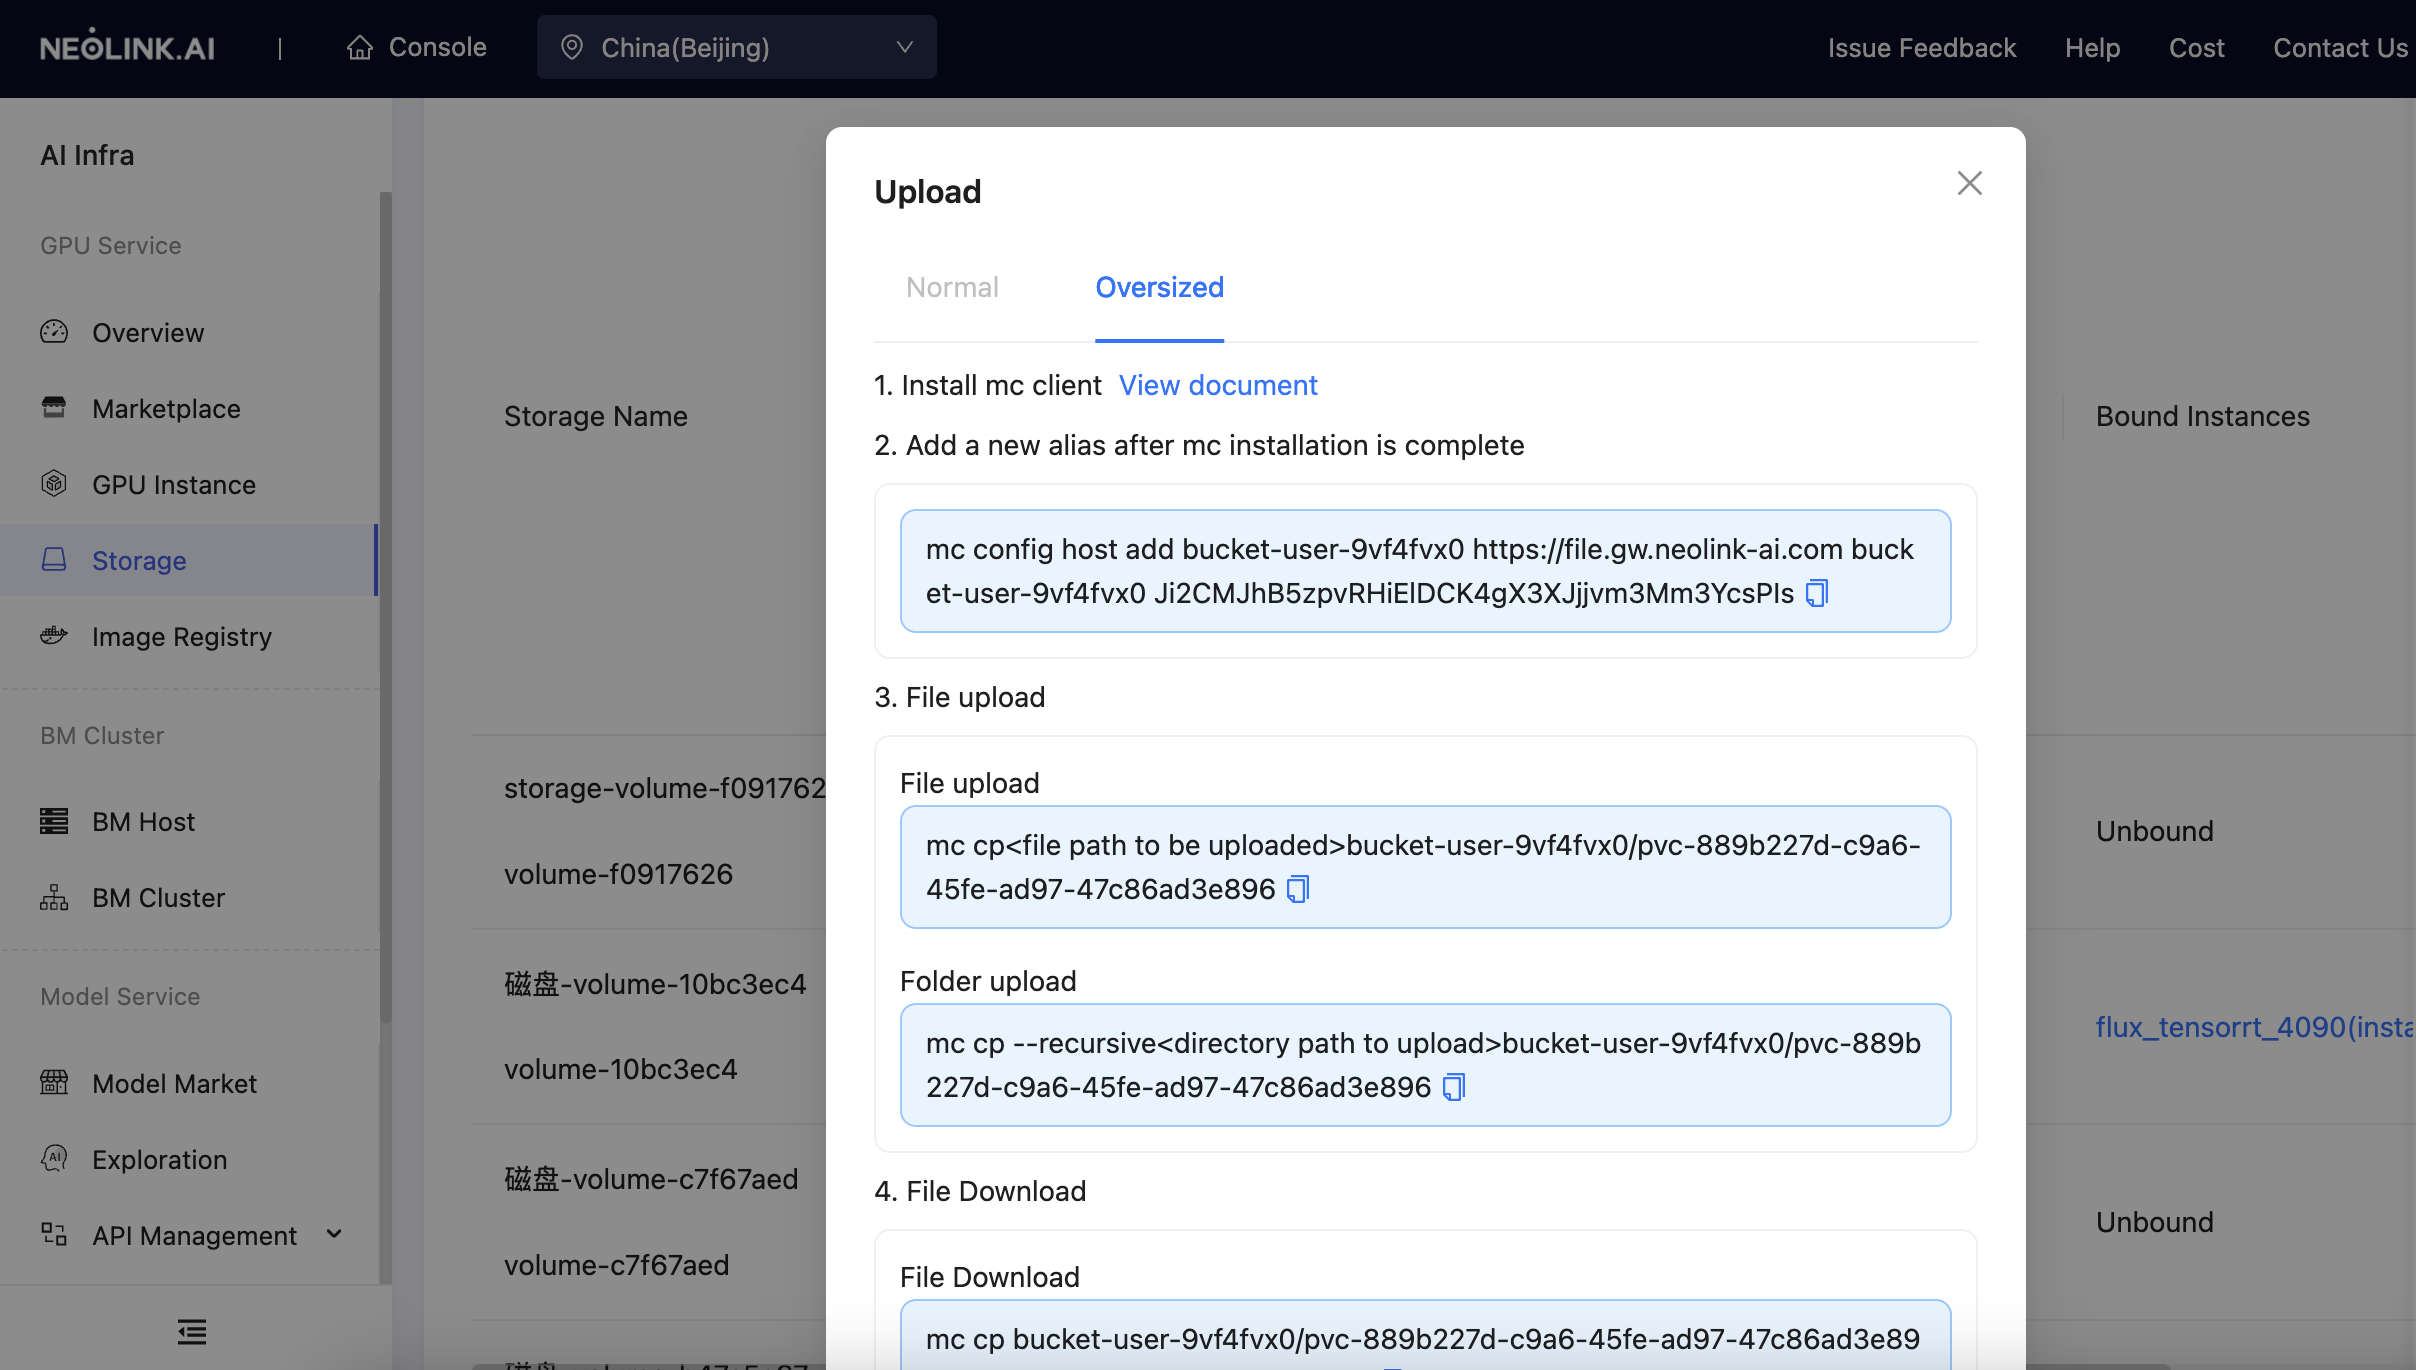
If you need to upload folders or use more advanced upload methods, go to Storage in the sidebar, click Upload, and select the code or data you want to upload. It is recommended to place the data disk in the /root/data path of the instance.